A chain link fence is a crucial element to add to your property if you want to create a protective boundary for children, draw a perimeter to a commercial estate, or simply create a partition between lands.
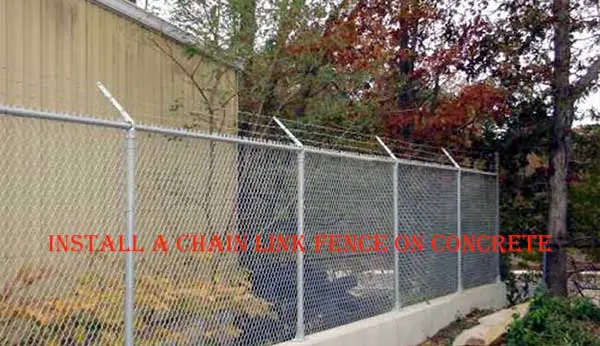
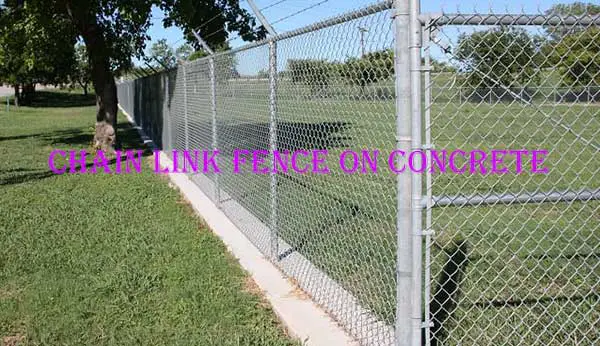
Traditionally, chain link fences are installed directly on the ground by digging a straight hole, positioning the posts and lastly, sealing it by pouring cement mix. However, things take a different turn if you have a fixed concrete slab in place beforehand.
In this case, you will need to install the posts of the fence through the concrete slab to the ground. Now, this may seem like a lot of work. But thanks to modern technology and the right equipment, this job is as easy as a breeze.
There is multiple ways of How to Install Chain Link Fence on Concrete. Depending on how you want the finished result to look, you can choose any of these methods.
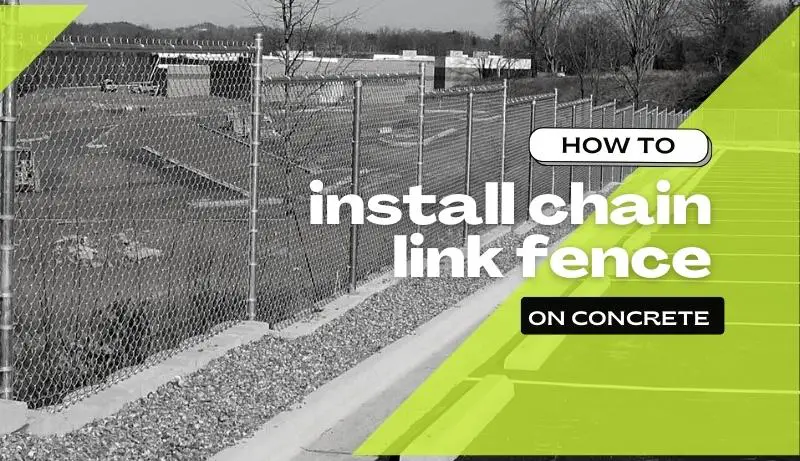
How to Install Chain Link Fence on Concrete
1. Planning and spreading out the fence
Before installing the fence, you need to lay out the parts before the designated place on the ground. Then you have to figure out where the ends, corners and gates will be situated in the fence you are arranging. The terminal posts and line posts are generally situated in a straight line.
You can draw a rough sketch to divide the distance between the line posts and mark the ground accordingly beforehand. And remember to check the Solar Lights for Chain Link Fence.
2. Installing the chain link fence posts
Next, you need to install the fence posts on the ground. If you are directly sinking it into the dirt, you have to dig a hole of 18 to 36 inches in depth and 8 inches in width. But if you have a concrete slab in place then you may have to use one of the following methods:
-
Mounting the Fence Post on Surface with Anchor Bolts
In this method, the fence posts are directly mounted on the slab with base plates (also known as anchor plates) and anchor bolts. If you are looking for a clean, classy finish without damaging the concrete, then this may be the ideal method of installation for you.
An anchor or base plate is a levelled plate made of metal, which is placed at the bottom of the fence post. The base plate has holes throughout its body and through these, the anchor bolts are drilled onto the concrete to hold the fence post erectly. You can use a hammer drill to put the holes in the concrete. Finally, the plates will be welded to the bottom of each fence post.
-
Making a Core Drill Hole through Concrete
If you are worried about the sturdiness of the bolts to the concrete surface, you can make a core drill hole through the concrete slab to install the fence post. This is similar to the traditional way of installing a fence post directly to the ground and it ensures a solid foundation for the posts.
First, using a core drill, you will need to drill a hole through the concrete. You need to make one hole for each post on your fence. And if you don’t own a core drill, then you can rent one from any hardware store.
Next, you need to sink the posts in the drilled holes similar to the way you would sink them in the dirt. After setting the fence posts in place, pour the cement mix or concrete around the bottom of the post. Lastly, complete the concrete flush with the existing slab. You can use some Chain Link Fence.
-
Sink The Fence Post prior to Pouring Concrete
In this method, you have to sink the fence posts before pouring the concrete mix. You can install the fence post using the traditional way into the dirt. Then pour the concrete around the bottom of the posts. This is the ideal method of installation if you are fixing the fence alongside existing concrete.
No matter which method you choose, remember to let the poured concrete harden completely before continuing with your work. You can check out our picks for Privacy Screen for Chain Link Fence as well.
3. Assembling the Parts
First, you need to attach the tension bands on the terminal posts. Then add the rail end bands and post caps to the terminal post. Next, position the circular loop (also known as an eye cap) to the top of the line posts.
After assembling the posts, slip the rail pipe through the circular loops and fasten it to the end cap of the terminal post. For more suggestions, you can read about Paint for Chain Link Fence.
4. Attaching the Fabric
First, layout the fabric or chain link mesh in front of the fence posts on the ground. Put the tension bar through the first row of the mesh and attach it to the tension bands in the terminal posts. You can secure the mesh to the top portion with zip ties.
However, make sure to not cut the mesh for any reason. If you want to modify it, you may unwind it using pliers.
Next, slide the tension bar about 3 feet from the open end of the mesh and secure the fence stretcher between the tension bar and terminal post. You need to stretch the mesh until it lightly concedes when pressed. You need to spread the mesh to the exact distance and fasten the tension bar to the terminal posts. Lastly, tighten all the carriage bolts of the tension bands.
5. Secure the Gate
Now that the chain link fence is attached, all you need to do is to secure the gate posts to the fence. Fasten the pin of the hinges to the gate post in such a way that the top hinge faces downwards while the bottom hinge faces upwards. Finally, attach the gate to the top rail of the fence.
How to Install Chainlink Fencing on Concrete Posts
Final Thoughts
We hope that going through the above methods will make the process simpler for you. With the right tools and assistance, you can install a chain link fence to your concrete slab without damaging it or making it look unseemly.
So go ahead and use any of these methods to change the look of your property!
Related Post:
- How to Cover a Chain Link Fence with Wood?
- How to Test an Electric Fence Charger?
- How to Install Chain Link Fence on Concrete?

David, the founder of The Garden Fixer, started with a passion for gardening in 2012. He has continued his passion for gardening and desire to improve his skills and wanted to share his journey and helpful knowledge with other like-minded individuals.
He launched The Garden Fixer as an outlet for those interested in learning more about Gardening in hopes they can take what they learn and apply it for themselves!