You cannot construct a building without having a strong foundation first. Similarly, if you want to install a fence post, you must begin with positioning a strong base.
A 4×4 post is a popular option for its solid and rigid support. If you want to build a deck, rail or fence on concrete, this post is your ideal choice for a base. Due to its durability and versatility, it can be used on concrete patios, porches, and steps.
These metal posts are loved by professionals as it is one of the strongest yet sophisticated fencing styles. It blends exceedingly well with outdoor decorations and gives a sturdy base for more.
But due to its ease of installation, it has become popular among people who like to work on their own home projects.
So if you want to install a fence for privacy or a railing for safety on a concrete slab, using a 4×4 post is the way to go. Below are some ways of installing a 4×4 post on concrete.
See Also: Our guide to the Fence Post is also useful product for you.
The 3 Ways of How to Install 4×4 Post on Concrete
Depending on the project and look, you may choose any of the following methods for installing your post.
1. Mounting Post on the Surface of Concrete
You can mount the 4×4 post base on the surface of your concrete slab if you have more than one point of support on your post. Now such posts are usually fastened to the concrete base at the bottom and to a roof on the top.
These metal bases are often used for railings on steps in residential areas. Generally, they will be directly attached to the surface of the concrete below.
This is a simple and quick method and needs two people to get the job done.
First, take the fence base post support and put it onto the concrete slab where your post needs to be installed. Next, grab a pencil and mark the 4 drilling holes on the concrete. You can also mark the spots by a quick blast of your drill.
Remove the base once you’ve finished marking and drill into the base with a hammer drill and masonry drill bits. Then align the post support over the holes and fix it using the concrete fixing bolts.
Finally, insert the post in the base and tighten the bolts to hold it in place. You need to use a spanner and ratchet set for this.
Remember to tighten the bottom bolts first because it would help to ensure that the post is upright. Even so, while you are tightening the bolts, use a spirit level to make sure that the post is symmetrical.
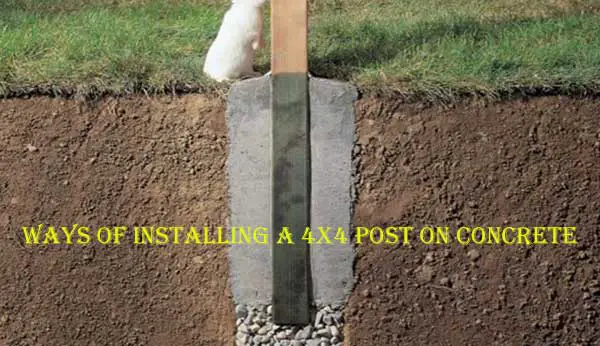
2. Mounting a Core and Set Post on the Concrete
You may be worried about the sturdiness of the bolts to the concrete surface, and rightfully so. If the post has only one point of support at the base, it would not be rigid enough to endure much force and may break off if enough lateral impact is applied.
Generally, such is the case with post fences on concrete and freestanding railings on porches.
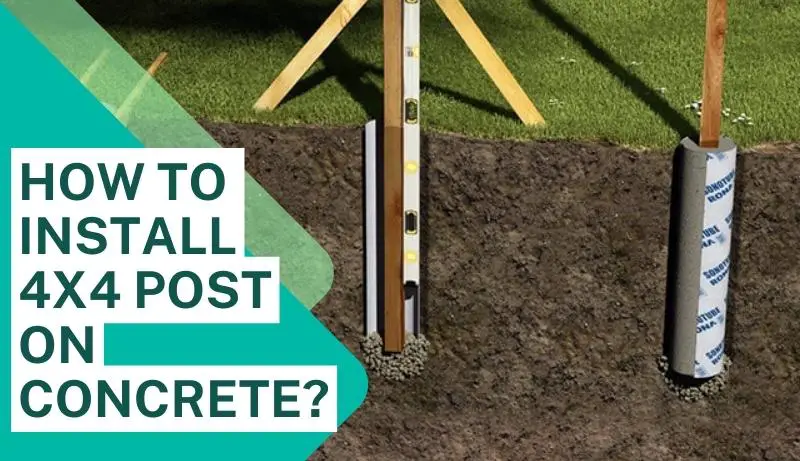
In this situation, you need to make a core through the concrete base and install the post to ensure a rigid foundation.
First, you need a core drill machine to drill the hole in the concrete. The core must have a depth equal to one third of the height of the post through the solid concrete. Make sure to mark the depth beforehand.
After you have achieved the required depth, turn off the drill motor and raise the core drill bit off the hole. You can raise the core using a hammer drill with a carbide bit. If you don’t own a core drill, you may rent one from any hardware store. But be careful in the process if you are not familiar with coring concrete.
Now, place the post support in the drilled hole. This is similar to the way of sinking posts directly in dirt. Next, you need to insert the post onto the support and tighten the bolts to hold it upright.
Finally, pour cement or concrete mix around the bottom of the post base and flush it with the existing surrounding concrete. You can also use some Electric Fence Wire.
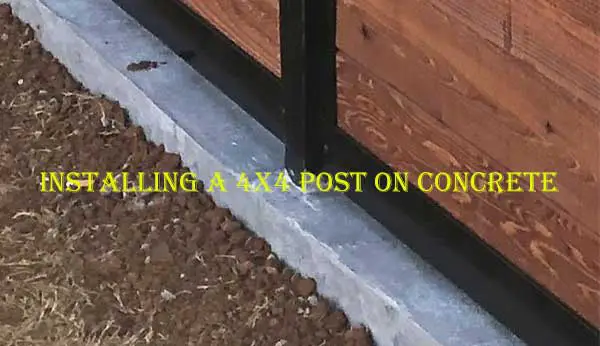
3. Side Mounting Post on Concrete
If you are working on elevated masonry bases, you need to use a 4×4 post side mounting bracket. This bracket is installed sideways on the concrete and provides a sturdy base for handrails on concrete steps or raised porches.
When you are mounting sideways, you need to fasten one third of the post below the topmost portion of the concrete base. Generally, two or more sleeve or concrete anchors (also known as thru bolts) are used to attach the post firmly in place.
The thru-bolts are known for being heavy duty anchors for fixing objects to masonry surfaces. The process of side mounting is easy and the result is extremely sturdy when done correctly.
Firstly, you must remember to drill the correct sized hole in the concrete. The required size for drill is mentioned at the end of the bolt so make sure to take a look. If it says “m12” on the bolt, then you will need an “m12” drill for drilling the hole.
Now hold the bolt adjacent to your drill and mark its length on the drill to see how deep you need to drill. You should mark half an inch more than the length of your bolt.
Then, fasten your 4×4 post side mounting bracket to the concrete base and mark the drilling holes with a pencil. Remove the bracket and drill through the concrete.
After reaching the required depth, align the bracket with the holes and fix it in place using the thru-bolts. Lastly, insert the post and use a spanner to tighten all the bolts.
How To Set Pressure Treated 4×4 Wood Posts In Concrete
Final Thoughts
Therefore, with the proper tools and machinery, you can install a 4×4 post on concrete by yourself. With the above methods installing a post for deck, rail or fence will be a piece of cake for you. So put on your safety goggles and build your masterpiece in a jiffy!
Also Read: Additionally, you can check our blog on How to Install Chain Link Fence on Concrete.

David, the founder of The Garden Fixer, started with a passion for gardening in 2012. He has continued his passion for gardening and desire to improve his skills and wanted to share his journey and helpful knowledge with other like-minded individuals.
He launched The Garden Fixer as an outlet for those interested in learning more about Gardening in hopes they can take what they learn and apply it for themselves!