Chain link fences are useful for enclosing outdoor spaces. In terms of house security, their lack of privacy is a benefit since keeping street sightlines open is crucial.
However, such a fence isn’t recognized for seclusion or aesthetics. Chain links may be a blight on yards despite being an inexpensive, effective way to keep dogs and children safe.
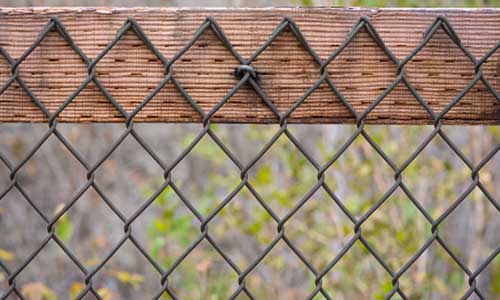
Solid fences can replace chain link fences. Yet, this fencing may be difficult to remove. Chain link posts are dug deep and secured with concrete anchors, like tree roots.
Metal posts loaded with concrete are tough to remove. After removing the posts, the chain link is unwieldy and hard to dispose of.
On that account, adding a privacy screen can be a substantial pick. That will give a professional look to your outdoor area as well.
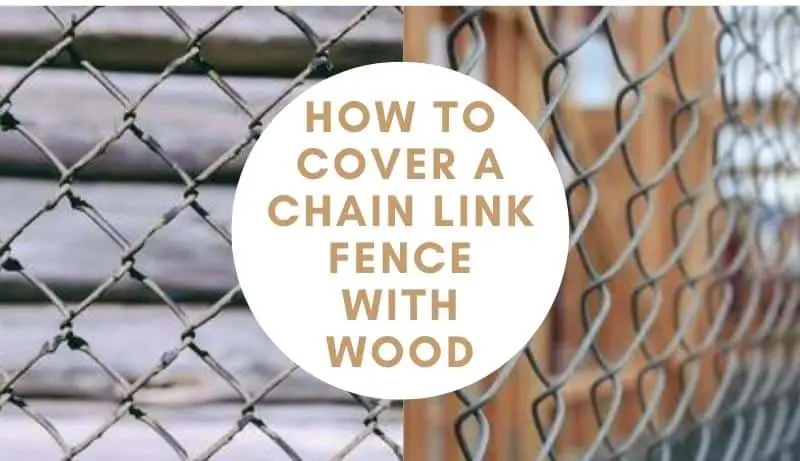
If you find installing this entire setup a confusing procedure, don’t fret! In this article, we will share guidelines to cover a chain-link fence with wood.
Continue reading to find a fuss-free technique to renovate your fencing!
Related Post:
- Checking the Chain Link Fence will be helpful as well.
- In addition, you can check the recommendations for the Electric Fence Wire.
- You can find an in-depth suggestion for Privacy Screen for Chain Link Fence by simply clicking here.
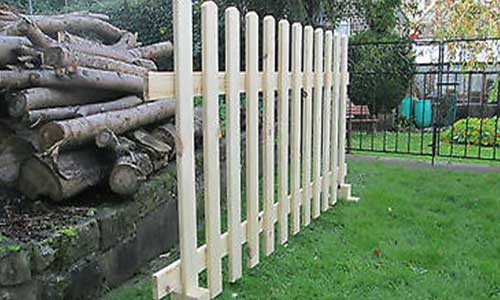
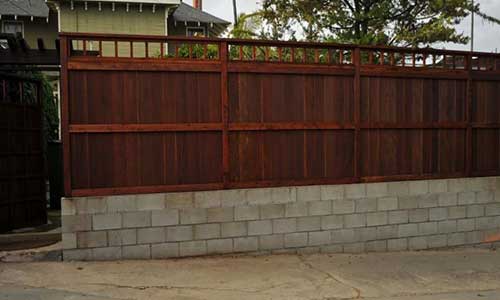
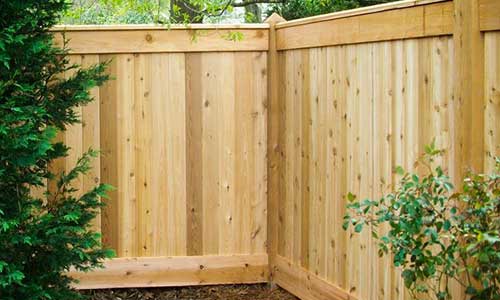
Wood Fence Panels – but Why?
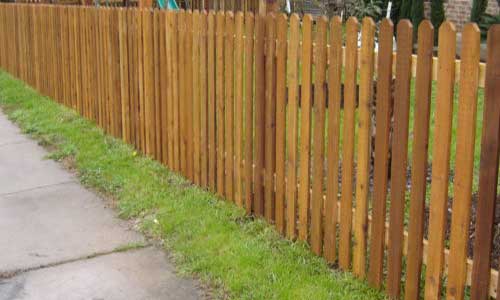
Wooden paneling often has high durability. If you utilize cedar, the wood’s high oil content makes it weather-resistant by nature. To increase the lifespan of any type of wood, a sealant can be sprayed on it. High privacy coverage (about 90 percent).
This is one of the few solutions that will completely alter the appearance of your chain link fence. The chain link is still discernible in some areas with all other alternatives.
It costs between $145 and $160 for a single 6 feet tall by 8 feet long wood fence panel. Generally, the panels because fence panels are bulky and heavy (approximately 160 pounds). For that, it is better to get a big truck and a helper to help you pick it up.
To affix fence panels in front of chain link fencing, you might need to obtain a fence permit. There are no hardware kits or systems that assist you in making this panel work. Herefore, you have to be quite handy and creative to make this option work.
Additionally, it takes two people to carry fence panels because they are so heavy and difficult to handle.
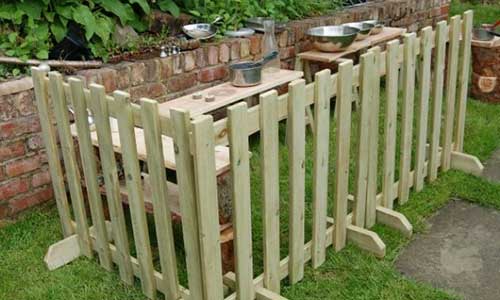
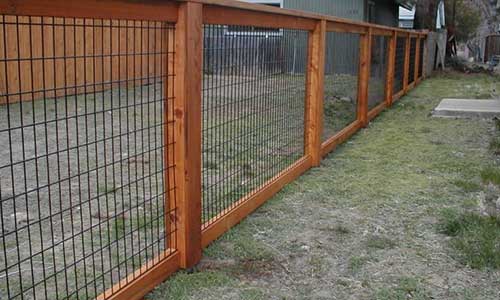
Things You Will Need to Cover a Chain Link Fence with Wood
In addition to the wood panels, you will need a few other pieces of equipment to install the wood covering. Sorting these things in advance will make your task a lot simpler.
The primary elements you’ll need to fix a wood screen to the chain link fence are listed below:
- Shadow Box Fence Panels
- 4 – 2 3/8″ End Posts
- 1 – 1 5/8″ Line Post
- Oz-Post Steel 2 Wood Fence Bracket WAP-OZ
- Post Caps
- Foam Sealant
- Bolts, Washers, Nuts
- Tension Bands
- Drill and Bits
Also Check:
- Besides, you can choose some Fence Post.
- Additionally, you can check our review on Temporary Fence.
- For more suggestions, you can read about Paint for Chain Link Fence.
Steps to Cover a Chain Link Fence with Wood
Step 1:
Remove all of the chain link fencings that are attached to your steel posts, including the top rail. After that, sell your chain link to your father for $10 by rolling it up.
Step 2:
For this step, you will need to check the size of the wood panel. If the fence is more than 6 feet, you can skip this step.
By constructing a sleeve with a varied width fence post, you can heighten the steel fence posts. A 2 3/8′′ end post at the front where the gate was, two 1 5/8′′ line posts in the middle, and a non-standard width post at the back made up the three varied widths of my steel fence posts.
Adjusting the height of the line posts
We recommend squirting some spray foam inside the posts to hold everything firmly in place. That will reduce the itchy sound the post makes.
Since the 2 3/8′′ end post fit over the non-standard-sized post at the back, apply a similar technique.
Adjusting the height of the end posts
Assuming whoever erected your chain link fence dug a 2′ hole, your 6′ inner sleeve will fall into the end post and be difficult to remove.
Before inserting the 1 5/8″ sleeve post into your end post, feel the bottom of the hole. If you don’t feel anything solid, throw rocks or stones into your post and test until you feel them connect.
After spray foaming the inner sleeve to stop rattling, cut a 2 3/8″ end post to complete the 6′ height. You’ll have a 4′ end post, a 2′ section, and a 6′ inner sleeve. JD Weld Steel Stick helped keep together the two end post portions.
Step 3:
Use the excess shadowbox fence panel from Home Depot into individual sections by tearing it apart. Since you just spent $50 on three non-standard 2x4s, make sure you remove all of the nails from the pickets and take great care not to break the cross pieces.
Our model demanded to span across the two center posts with six equal portions of cross-pieces. Hence, we divided the pieces from my panel in half as our model.
Step 4:
Attach three tension bands to the steel post beginning at the front end, aligning them with the cross pieces of the fence panel. Drill a hole big enough for the bolt after marking the tension band hole on the cross-sections.
Using a bolt, washer, and nut, fasten one end of the fence panel to the post before attaching the tension bands.
The fence panel’s opposite end should still be free. Your panels should line up and meet at the center posts if your steel posts were 8′ apart. This will allow you to proceed to Step Six with the WAP-OZ brackets. Using the crosspieces cut in Step Three, we still had to fill the gap.
Step 5:
Connect the third fence panel after attaching the final three cross pieces to the end of the middle panel. Use the tension band technique from Step Four to join the back fence panel to the post after aligning it with the final steel post.
Now that the end panels are attached to the end posts, the middle panel can move up and down along the extended cross pieces.
For symmetry, place the middle panel in the space between your fence posts. Then reposition your new crosspieces so that they span your fence panels equally.
Step 6:
Connect your three cross-sections to the steel posts using the WAP-OZ brackets. You can use these brackets as you like. We loosened them just enough to slip over the top of the post before starting and dropped all three on.
It would be beneficial if you had a socket bit for your drill because it took a long time to hand tighten all of these bolts. The cross-sections that bridged the gaps were all joined by our brackets.
However, if your posts are spaced 8′ apart, you’ll be using the brackets to join your fence panels. In the bracket, your panels will therefore butt together.
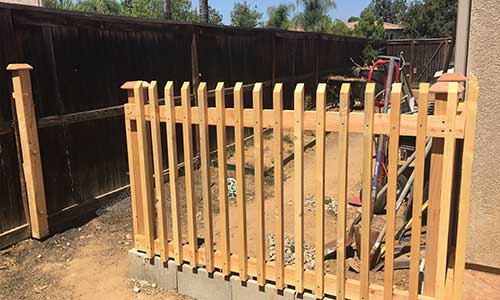
Step 7:
After installing your brackets, cover the tops of your steel posts with post caps to prevent future water accumulation. Pickets were still needed to close the spaces between the panels, so I positioned them evenly and nailed them into place.
Step 8:
If you want to transform a chain-link fence into a wood fence, you can add more pickets to cover the steel posts. Once stained, they blend in nicely and were large enough to cover the brackets and the post.
Step 9:
Stain the fence yourself, or if you have mono, have your mother do it while you sit in a chair and observe.
The next step is to construct a gate to block the driveway so that Freddie can freely wander the yard. Has anyone among you made their endeavor a little more difficult by attempting to work with what they already have? Comment below and let me know.
Other Alternative Techniques
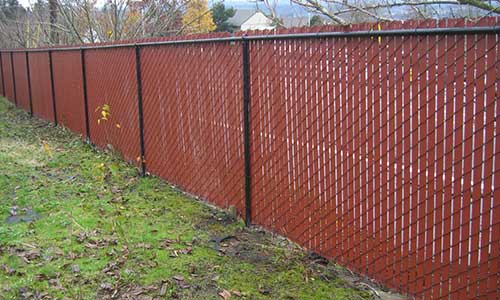
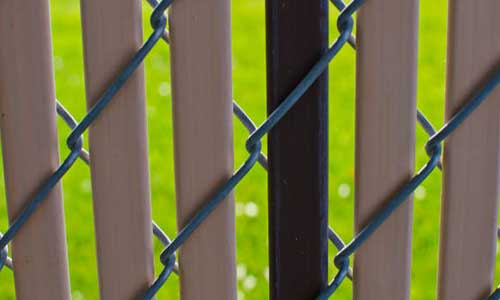
Fence Slats
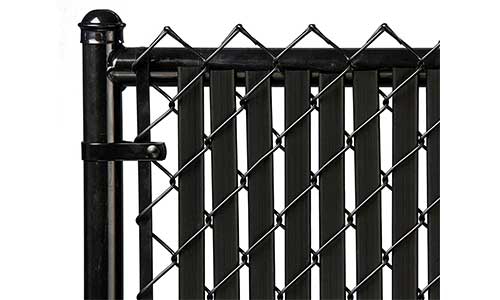
Why not construct a whole fence form of long, narrow pieces of chain-link fences to permit their vertical insertion?
This traditional method of adorning chain link fences is intended to achieve that. These individual slats are attached in no way and simply slip in from the top. Aluminum or high-density polyethylene is used to make slats.
At 6 feet high, ten linear feet of chain link slats cost between $90 and $110. It’s simple to install.
Slats of chain link fencing are quite strong and can survive for many years. Over fifty years later, slatted fences are still in place and still offering protection. Slats that have been damaged can be replaced one for one.
Slats are frequently thought of as ugly. Only around 75–80% of the visual field is blocked, which is a poor level of privacy coverage.
The price can be unexpectedly expensive. Installation is time-consuming and laborious since each slat must be slid in individually.
Reed Screens
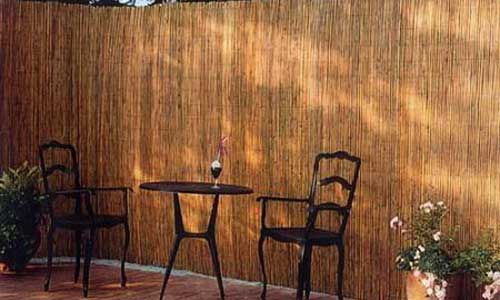
Approximately the same thickness as a drinking straw, thin bamboo reeds are weaved into mats that range in length from 8 to 16 feet. These rolls are simple to travel from the home improvement store and back. Normally, reed screens are mounted vertically.
When brand-new, reed screens provide roughly 85% privacy. Privacy is lost as the screen disintegrates.
Reed screens are fairly affordable, and most home improvement stores have them in stock. Reed screens can roll out and tack up quickly if you need to cover your chain link fence in one day.
For roughly a year or two, reed screens retain their appeal. The reeds then turn gray and begin to fall out of the material used to weave the wire. Reed screens are a good temporary solution but a bad long-term option.
Bamboo Screens
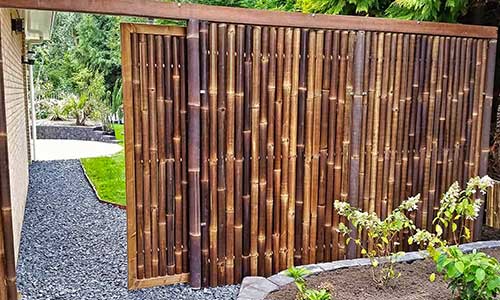
The linked poles used to build rolled bamboo fencing range in thickness from 3/4″ to 2″. Using foot-long sections of 16 gauge wire tied directly to the rails and poles, full bamboo pole screens can be built on chain link fences.
As opposed to poles with exposed ends, use poles that are chopped on the bamboo nodes since they perform better. The nodes serve as organic weatherproof caps.
Full bamboo screens provide a beautiful, organic appearance. The coverage rate is a respectable 85%. Full bamboo screens are a great place to start if you want to infuse your house and garden with a lively, tropical atmosphere.
Only fairly durable, bamboo. Untreated bamboo, which is as resilient and sneaky as a growing plant, gradually turns brown and silver and begins to show long, vertical fissures.
Read Also:
What should be the ideal length of the wooden panel?
Use boards or pickets for wood panels. Wood panels should be 6-10 feet tall, 1-2 inches thick, and 4-6 inches wide. 1x4x6 is the recommended size.
Can I customize the wooden panel?
Yes.
Usually, wooden panels come in a standard length of 6 feet. Nevertheless, you can customize the length of the panel according to your need.
Is there any alternative to wooden panels to add privacy?
Yes.
Apart from wooden panels, there are a handful of options available in the market. You can find the options in the previous sections.
What is the durability of the wooden panel?
Plywood and OSB are used to make extremely strong structural panels.
These panels can support both heavy loads parallel to their surfaces and uniform weights perpendicular to them. Various panel kinds and grades resist impact loads to varying degrees.
What’s the composition of the chain link fence slats?
A metal or plastic attachment called a Fence Slat transforms a chain-link fence into a privacy fence.
Aluminum or a plastic material makes up the majority of slats. Slats are not only useful for privacy. For designs or company branding, they can be blended in various color schemes.
What should I do for the maintenance of the wooden panel?
Make the surface as clean as you can by removing significant amounts of dirt or dust (if present) with a soft brush or dry cloth.
To clean the surface, use a sponge or a microfibre cloth. Spray glass cleaner onto the surface or combine all-purpose cleaner and water.
How is wood fastened to a chainlink?
With an equal amount of overlap on both sides, position it in the middle of the top and bottom rails. Next, affix a fence staple to each edge of the wire mesh. After that, fix the edge vertically by inserting staples every six inches.
Final Words
The horizontal boards in this smart cover-up do more than just provide privacy for an open area. They also give conventional fencing a new, contemporary spin.
Your uninviting backyard will be transformed into a tranquil outdoor space. That too, for the modest cost of a few wood planks and screws with this easy DIY project.
Let us know your thoughts!
Also Read:
- How to Build a Garden Fence to Keep Animals Out? Easy Method in 2022.
- Seven Very Cheap Garden Fence Ideas? Easy Tips for Beginners in 2022.

David, the founder of The Garden Fixer, started with a passion for gardening in 2012. He has continued his passion for gardening and desire to improve his skills and wanted to share his journey and helpful knowledge with other like-minded individuals.
He launched The Garden Fixer as an outlet for those interested in learning more about Gardening in hopes they can take what they learn and apply it for themselves!
